
|
|
89%
Abstract: The 3DCooler-Pro is an an all-in-one aluminum and
copper heatsink designed to support all processors currently available.
|
Home >
Reviews >
Page: Closer Examination of the Heatsink
|
| Gigabyte 3DCooler-Pro
Heatsink From All Angles |
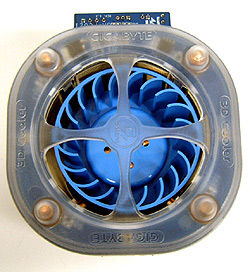 |
The Fan:
The blue squirrel cage fan is
constructed of two 25mm tall sections placed together end to end. The top fan draws air in from
the side which is visible in the picture to the left, and the
opposite end draws air in under the aluminum fins. The fan works by exhausting that
air out through the central cylinder of aluminum fins, to keep them cool. The translucent plastic cover protects the circuitry which controls fan speed, and also diffuses the bright blue LEDs soldered to the blue
PCB. The Gigabyte 3DCooler-Pro connects with a standard molex pass through cable, and an additional 3-pin
motherboard fan header supplies an RPM signal to the operating system/BIOS. |
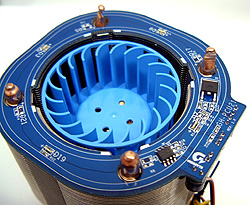 |
Heatsink
Top: The fan is
firmly attached inside of the aluminum finned
section so it could not be removed. Under the clear plastic
cap which comes off a little too easily, we find the PCB and
circuitry which controls fan speed, and the blue LEDs. A fan speed controller
attaches to the PCB here, and connects to a PCI bracket or aluminum FDD bay
bracket which can be placed at the front or rear of the case depending on
your preference. |
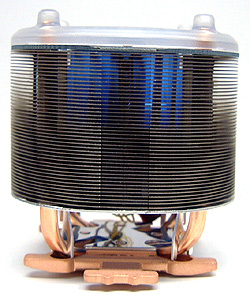 |
Side A:
The entire 3Dcooler-pro heatsink stands
about 92mm tall, making it pretty big compared to the
last few heatsinks to cross our test bench. The forged copper base is
about 6mm thick on average, and connected to the rest of the
heatsink by four sections of 6mm diameter copper heatpipes (2 heatpipes bent into "U" shapes).
The aluminum fin section measures 51mm tall by 83mm wide. Note the translucent plastic
cap which protects the circuitry and diffuses the blue LED illumination when the heatsink is powered
up. |
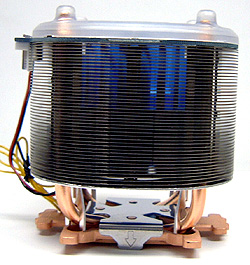 |
Side B:
The 43 aluminum fins each measure 0.4mm thick, and are
spaced approximately 0.8mm apart. The copper base is capped with a small
section of stainless steel, and it is over this that the K7 and K8 clip
mechanisms rest to hold the Gigabyte 3DCooler-Pro in place. The socket 478
clips rest on the small copper tabs visible in
the picture to the
left. Installing the heatsink isn't all that complicated since it is a tool free unit, but
it is vital to make sure the heatsink is oriented properly for each particular socket and
processor. |
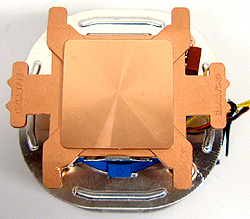 |
Heatsink Base:
The copper of the 3DCooler-Pro has been nicely machined
from the granular casting, and measures 40x40mm. Being forged, the copper is
a little more stiff than
with a traditional punched sheet metal base, and takes milling nicely. The surface finish is very
smooth, and surface flatness is excellent according to our straight edge. The 3DCooler-Pro even comes
with a small syringe of thermal compound to make installation a
breeze. |
|
 |
Websites you may also like:
PCSTATS
|
|
 |


