
|
|
97%
Abstract: Fresh from the chrome plated Jet4 wonder, Cooler master are back with the brand new 6-heatpipe packing Hyper6 KHC-V81-U1 Intel Pentium4 and AMD Athlon64 heatsink!
|
Home >
Reviews >
Page: Examining the Heatsink
|
| Coolermaster KHC-V81-U1
Heatsink From All Angles |
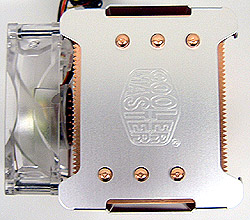 |
The Fan:
Each of the six
6mm diameter copper heat pipes pokes its top through the aluminum fan
shroud emblazoned with the Coolermaster logo. A 80mx80mm fan can be
mounted to either side of the heatsink (it really doesn't matter which you
choose), though only one fan actually comes with the unit. With the
aid of the fan-speed controller, the
A8025-30CB-3AA-PI Coolermaster fan spins at between 1800-3000RPM.
The fan draws power through a standard molex pass through, and
a single 3-pin fan header sends the RPM monitoring signal
to the motherboard. |
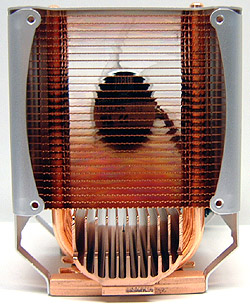 |
Heatsink Top:
Looking at the Coolermaster KHCV81U1 from the
side, we get a better idea of how the entire heatsink is assembled. At the
bottom is a hefty 5mm thick copper base, to which the six heatpipes
are soldered. The heatpipes in turn rise up through the 0.4mm
thick stacked copper fins which in turn absorb the heat. Below all of this is
a small copper-plated heatsink which is screwed into the copper base, and soldered
in place. I guess the manufacture sees a possibility of it being knocked loose -
so it's good to see Coolermaster have taken the extra precaution to ensure this
doesn't occur. |
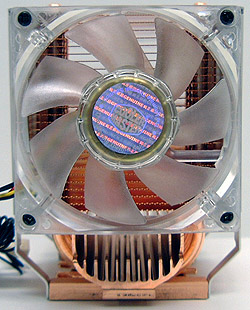 |
Side A:
The stacked copper fins behind the fan measure 0.4mm thick, and
are spaced about 2.5mm apart. Each copper fin has a serrated edge, a design element
no doubt used to disrupt laminar air flow from occuring over the smooth surface of each
fin.
The copper plated extruded aluminum heatsink
at the base caps off the six heatpipes, and adds a little extra cooling
potential into the mix too. The clips used to hold the Hyper6
heatsink in place are the same for both the Pentium 4
and K8 platforms (remember, it is the heatsink retention frame which has been heavily modified). They latch
into a small recess in the copper plated extruded aluminum heatsink under the fan, and that
holds the large, 800gram (estimated) Coolermaster Hyper6 heatsink in place. As always, it is not
recommended to leave such a large heatsink as this installed if you are transporting the
computer. |
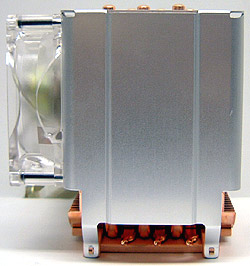 |
Side B:
The side of the Hyper6 is pretty plain,
with nothing much more than the aluminum fan shroud to look at. The six heatpipes
are visible at the bottom, soldered to the copper base. The 6mm diameter heatpipes are butted
up one against the other so they absorb as much heat from the processor below as
possible. |
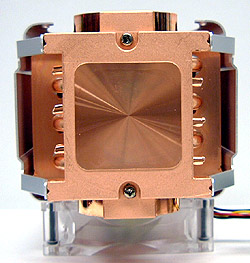 |
Heatsink Base:
The Coolermaster Hyper6 heatsink is built from the
ground up on a 5mm thick forged copper base. This is pretty much the exact
same technique used in the Gigabyte 3DCoolerincidently. In this case, you can see the six
heatpipes rising up from either side and going into the stacked copper fins. Each copper
fin is actually soldered to the heatpipe
for a good thermal joint. The copper base has been
very well machined, is perfectly flat, and very smooth. Note the screws
which hold in that small heatsink I mentioned
before. |
|
 |
Websites you may also like:
PCSTATS
|
|
 |


