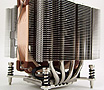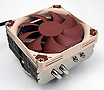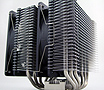
TOP 5 Heat Sinks TOP 5 Low Profile Heat Sinks TOP 5 Liquid Coolers
Heatsinks by Brand / Mfgr Reviews + Articless Advanced Search
|
TOP 5 Heat Sinks TOP 5 Low Profile Heat Sinks TOP 5 Liquid Coolers Heatsinks by Brand / Mfgr Reviews + Articless Advanced Search |
Stage 1 - Building the thing Now things get fun. We started by taking everything out of the case. We stripped it down to the bare bones and then started to build. The
Internal Cooling Engine!
The main problem with building a water-cooled system that is self-contained is how to keep the water cool. In the traditional "fish tank" system you have to replace the water when it get warm. Also the external model can hold for more water, thus taking longer to warm up. This meant we had to cool the water inside the case and we had to do a good job of it. We first found a nice big radiator that was great - but it would not fit inside the case. So off to Active surplus (a nice little store on Queen street in Toronto) We found most of our supplies for the project there and we also found two very thin radiators! We built some rails on the inside and mounted 4 fans. There is enough room to put 6 12V in but I only had 4. The most powerful fan was put on the side where the hot water enters from the CPU. The fans are sandwiched in-between the radiators and all 4 blow hot air out. The
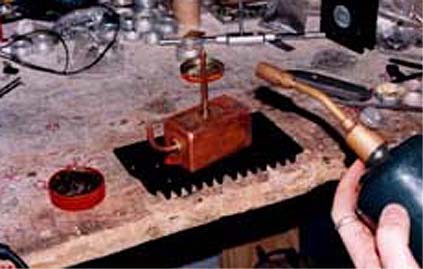
Copper CPU Jacket
This was my favorite part of the project. The copper case that we used was originally a microwave signal filter enclosure. It needed a some soldering to attach the intake and out take copper tubing. Important note: We made one mistake that we did not find out till the very end. We could not have known at the time but we should have made the casing a little smaller. It turned out to be too long and covered two of the three-dimm sockets. Not a big deal - but V.2 will fix that. We have one more of these copper jackets that we will use in V.2 or for the socket 7 version.
Now with the jacket done we had to attach it to the celeron heat sink. We were going to use the PII heat sink due to its longer fins, but too many modifications would be required to attach it to the CPU. Jacket. It turned out fine-because we used the PII heat sink on the back of the celeron. We next filed down the corners of the celeron heat sink so that the CPU jacket would fit on. We then made some scratches on the inside of the CPU jacket and on the area of the heat sink that would touch the CPU jacket. This was done so the "heat resident" epoxy had something to hold onto. We attached it on to the heat sink and then went to work on the PII heat sink. As you might know PII heat sinks don't have the same holes that the celeron does.   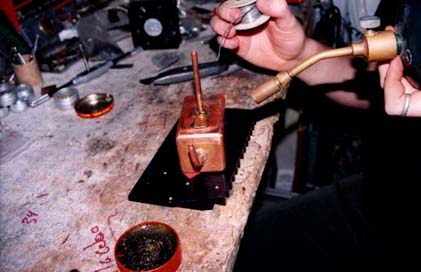 Well some drilling and a little touching up fixed that
all up. It was not as easy as that because we had to take out a few
fins so that our bolts that attach the celeron heat sink to the PII
heat sink had to go somewhere. Now if you look on the sides of the "crazy cooling device" you will see that we "me" decided to epoxy on two old Pentium heat sinks/fans. The neat thing about these heat sinks/fans is that they are thin. They suck the air through the sides of the heat sink. 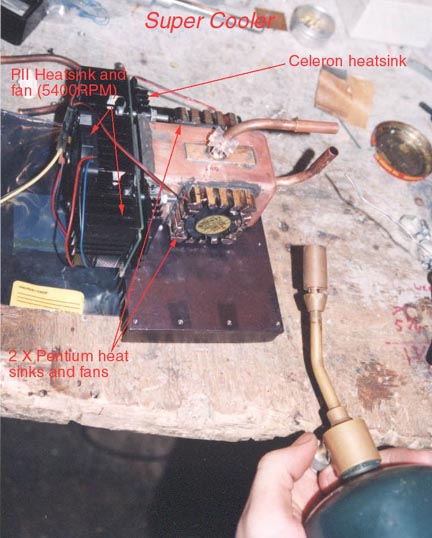 -This is just about when we noticed that the "crazy cooling device" was a little too long :(
|
|
|||||||||||||||||||||||||
|
Find a Heatsink . Latest Heatsink Reviews . Top 5 Heatsinks Tested . Top 5 Low Profile Heatsinks . Top 5 Liquid Coolers . Heatsinks by Mfgr / Brand |
Social Media |
FrostyTech.com Info . Feedback . Contact Us / Heatsink Submissions . Submit News . Privacy Policy |
 | |
© Copyright 1999-2023 www.frostytech.com All Rights Reserved. Privacy policy and Terms of Use Images © FrostyTech.com and may not be reproduced without express written permission. Current students and faculty of accredited Universities may use Frostytech images in research papers and thesis, provided each image is attributed. | ||||